Canva Craft Journal
Canva Craft Interior Design Prompts: Plan a Room Concept
Write Canva Craft interior design prompts with clear room features, furniture relationships, materials, and camera views. Review and hand off a useful concept.
Create an image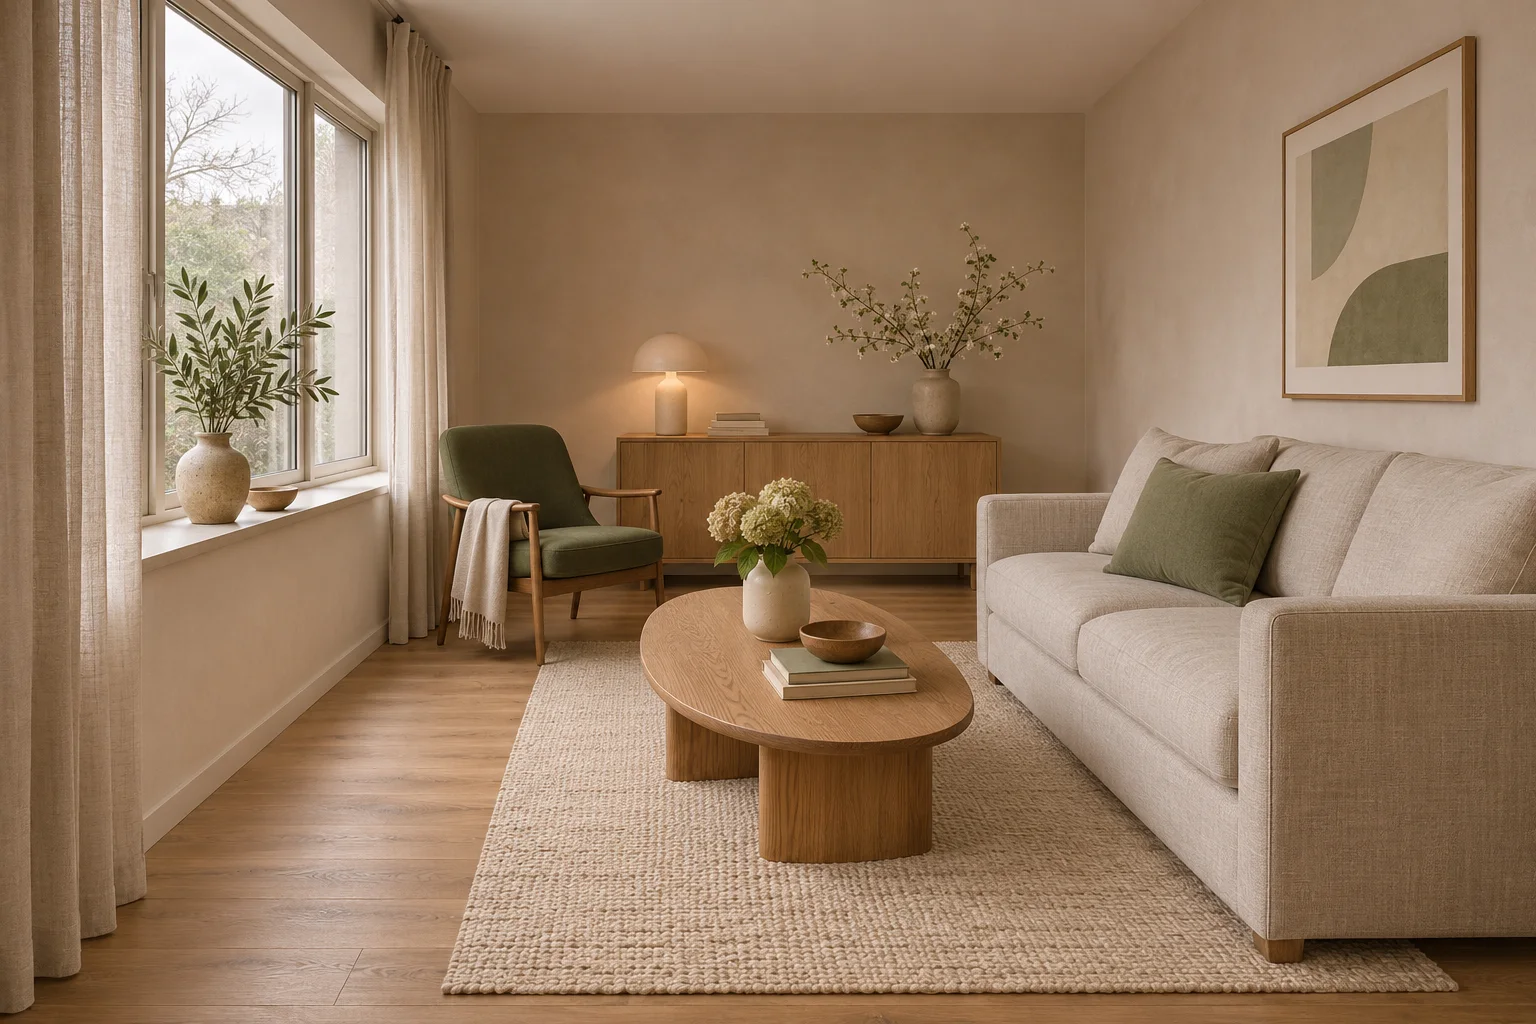
Canva Craft interior design prompts work best as room briefs: name the room, place its fixed features, describe the furniture relationships, and choose one camera view. Use the resulting image to discuss atmosphere and layout ideas, then check actual measurements before buying furniture or planning work.
Keep the CanvaCraft image workspace open while you prepare your scene description. Use the text-to-image controls and settings offered by your selected model. This guide develops a fictional living-room concept; the prompts are suggested starting points, not a recorded Craft test.
Canva's Craft announcement describes a planning stage for elements, spatial relationships, scale, and hierarchy before rendering. It also lists interiors and architecture as possible subjects. That makes a room brief a useful way to organize the prompt. It does not make a generated scene a measured plan or evidence that a particular arrangement will fit your home.
Decide what the room image needs to answer
Give the concept one decision to support. “Would warm oak and sage accents suit a quiet reading room?” is easier to evaluate than “Design my perfect apartment.” The first question produces a visual direction; the second leaves layout, style, budget, and practical constraints unresolved.
For our example, the deliverable is one landscape image of a compact living room. The goal is to explore a warm, restrained palette with two seating types. We are not generating a floor plan, a shopping list, or a representation of an existing property.
Separate what belongs in the scene from what you will verify elsewhere:
| Part of the brief | Put in the prompt | Check outside the generated image |
|---|---|---|
| Fixed room features | Window on the left wall; entrance behind the camera | Actual wall lengths, openings, and room photographs |
| Furniture relationships | Sofa on the right; chair near the window | Product dimensions and the space available in your room |
| Material direction | Oatmeal linen, warm oak, pale plaster | Real samples, finishes, and supplier descriptions |
| View and lighting | Eye-level view from the entrance; soft daylight | Whether the image communicates the intended concept |
If the decision concerns a real room, gather a simple sketch with measurements and a few photographs for your own review. Keep those beside the concept. A realistic-looking image can still move a window, hide a doorway, or exaggerate the room's width.
Write the room brief before adding style words
Start with a short set of constraints. In the fictional room, use one window on the left wall and one sofa on the right. Put an oval coffee table in front of the sofa, and a reading chair near the window. Keep the foreground uncluttered so the view into the room remains easy to understand.
Then choose a small material palette: oatmeal fabric, oak, warm plaster, and a sage accent. Describing the surfaces is more useful than stacking labels such as “luxury, modern, cozy, minimalist, cinematic.” Those labels can suggest competing directions without explaining what should appear.
Decide on the camera before asking for more detail. A view from the entrance shows the overall arrangement. A close-up of the chair might communicate fabric texture but conceal whether the rest of the room makes sense. Use separate images when you need those different answers.
Original AI-generated editorial concept illustration. It is not a Craft test output, a photograph of a real property, or a measured room design.
Use a prompt with explicit spatial relationships
Try this starting brief, adapting the objects and materials to your own concept:
Create an interior concept image of a compact rectangular living room.
View it at standing eye level from near the entrance, with natural
perspective and straight vertical walls. One broad window is on the left
wall. An oatmeal linen two-seat sofa sits along the right wall. Place a low
oval oak coffee table in front of the sofa on a flat cream woven rug.
Place one dark-green reading chair near the window, angled toward the sofa.
Keep the foreground uncluttered. Warm pale plaster walls, matte oak floor,
soft overcast daylight, restrained sage accents. No people, text, logos,
dimension marks, extra windows, or decorative clutter.
The spatial instructions carry the brief: left wall, right wall, in front of, near, and angled toward. The finish words come afterward. For a more general explanation of this approach, see the Canva Craft composition prompt guide.
Choose a landscape format if the image needs to show the furniture relationships. Select a resolution supported by the model and inspect the displayed generation cost before submitting. The aspect ratio and resolution guide explains format choices; a larger pixel count does not establish correct room dimensions.
Review the layout before judging the decoration
Look at the fixed features first. Is there still one window on the intended wall? Does the doorway area remain visible or understandable? Are there repeated chairs, merged furniture legs, or a table that intersects the sofa?
Next, inspect the relationships. Does the chair face the seating area? Does the coffee table belong to the same perspective as the rug? Can you understand the room without relying on a flattering crop? Treat a visible clear route as a composition cue, then verify real circulation space with measurements separately.
Only after those checks should you assess the palette, textile texture, and lighting. A beautiful cushion cannot rescue a concept whose wall arrangement contradicts the brief.
If you are considering a real room, compare the generated view with your sketch and photographs. Mark any changed opening or implausible proportion as a mismatch. Do not interpret a convincing render as confirmation that the layout has been preserved.
Revise one decision at a time
Keep a short revision note: the problem you saw, the instruction you changed, and whether the next result addressed it. These are examples of targeted revisions, not tested guarantees:
- The room looks too wide: request a natural field of view and reduce the visible floor area. Compare against your room references again.
- The chair blocks the window: move the chair toward the far end of the window and ask for the window opening to remain visible.
- The sofa dominates the scene: describe a compact two-seat sofa and give the chair and table clearer positions.
- The palette feels busy: remove extra accent colors and return to the four materials in the brief.
- The image adds objects: state the intended furniture count and remove optional decorations from the prompt.
If the room arrangement keeps changing, simplify the scene before adding more objects. A sofa, chair, and table give you fewer relationships to inspect than a crowded room with shelving, plants, lighting fixtures, and several doors.
For a materials alternative, keep the same camera and arrangement instructions while changing one finish family. For example, try cooler pale wood instead of warm oak. Separate generations may still change geometry, so compare the concept rather than treating the pair as a controlled before-and-after test.
Turn the chosen concept into a useful handoff
Save the selected image with its prompt and a plain-language note about the decision it supports. “Explore warm oak with sage upholstery” is more actionable than “Final living room.” Record unresolved questions beside the image: actual sofa width, the chair's location, or the finish sample still to review.
If you assemble a small mood board, put the concept image next to real material samples and verified product information. Label which items are inspiration and which are actual candidates. A generated chair or lamp is not automatically an available product.
For a client presentation, keep labels, dimensions, and notes editable in the presentation file. The presentation backgrounds guide explains that separation. Avoid regenerating an entire room just to correct a caption.
Before sharing, open the exported file and check the furniture edges, window placement, crop, and any unintended lettering at full size. Caption the image as a concept. Use measured plans and appropriate professional review for decisions about construction or installation; the image's role is to make a visual direction easier to discuss.
Capability statements checked against Canva's official announcement on November 4, 2026. The workflow and prompts are editorial guidance; no Craft generation test, room-accuracy measurement, or comparative benchmark is claimed.
Put your next idea into practice.
Start with a written brief in the image workspace.